 Skip to content


12 Tips To Improve Your Plasma Cutting Results
Plasma cutting is a handy, precise, and easy metal-cutting method. It allows you to effortlessly cut any conductive metal, like cutting butter with a hot knife.
Although plasma cutting is fundamentally straightforward, it takes time and practice to get the highest-quality, clean cuts on various metals. Therefore, we present you with tips to improve your plasma cutting results.
Whether you are a professional or a new welder, these tips can help you enhance your plasma-cutting skills and results. So, without further ado, let's learn more.

Plasma Cutting Process
Source: https://www.youtube.com/watch?v=I6_APvQR_2Q
Basics of Plasma Cutting
Plasma cutting is a metal-cutting process that uses the fundamentals of the fourth state of matter to pierce through metals. Plasma forms once gases such as air, oxygen, nitrogen, or argon are forced through a small nozzle orifice inside the torch.

What is Plasma?
Source: ResearchGate.net
The power supply, or plasma cutter, creates an arc between the electrode and grounded metal pieces. Once the arc heats the pressurized gases, they form a plasma stream.
A plasma jet, or plasma stream, can reach temperatures up to 40,000° F. This heat is more than enough to effortlessly pierce through the workpiece and blow away the molten material.
As a result, you can cut any conductive metal and a variety of material sizes. Welders use plasma cutting to cut anything from thin-gauge aluminum to stainless and carbon steel up to several inches, depending on the power of the cutting machine.

Plasma Cutting Working Process
Source: https://www.semanticscholar.org/paper/An-Experimental-Study-on-Reducing-the-Formation-of-DeVore/85db70ff2bb416e042e5293834750bfff20f8780
Essential Parts of a Plasma Cutting System
A plasma cutting system consists of:
-
Power supply (Plasma Cutter)
-
Arc starting console
-
Plasma torch
-
External gas

Plasma Cutting System Components
Source: https://www.youtube.com/watch?app=desktop&v=kJsn8l0FmTU
A power supply, or Plasma cutter, converts a single—or three-phase AC line voltage into a smooth, constant DC voltage required to start and maintain an electric arc. The electric arc passes through pressurized gas and creates a plasma jet that cuts through metal.
The Arc starting console produces the spark inside the plasma torch to create the electric arc. The console can use several arc starting methods, such as high-frequency start, pilot arc start, or spring-loaded start. Each has its ups and downs, which you can read about in our detailed article about How Plasma Cutting Works.
The plasma torch is an accessory and your cutting weapon. It uses several consumable pieces that, in conjunction, start and control the arc throughout the process. Consumables such as the nozzle, swirl ring, electrode, or cap can significantly impact your plasma-cutting results.

Essential Parts of a Plasma Torch
Source: https://www.youtube.com/watch?app=desktop&v=kJsn8l0FmTU
External gases are the "fuel" for your plasma-cutting operation. Pressurized gases, such as compressed air, nitrogen, argon, hydrogen, and oxygen, or blends of two or three components, form plasma once heated by an electric arc.
We mentioned the parts of the plasma cutting system because each component can affect your plasma cutting results. Knowing how plasma cutting works can help you troubleshoot issues and produce the highest-quality results.

Source: https://www.researchgate.net/figure/Schematic-diagram-of-plasma-arc-cutting_fig1_328284561
12 Tips and Tricks To Improve Plasma Cutting Results
Understanding how plasma cutting works is the first step in getting the best results. However, small things can make a significant difference between clean, dross-free cuts and poorly cut edges.
So, let's talk more about the tips and tricks you can use to improve your cutting results. Regardless of whether you are using plasma cutting for home, hobby, DIY projects, or professional metal fabrication, these tips can help you get the best out of a fascinating process called plasma cutting.

Source: https://www.youtube.com/watch?v=R9HeVdhuIn8
1. Choose the Right Plasma Cutter for Your Applications
Plasma cutters are simple little machines that produce the arc and power required to form plasma and cut through metal. When choosing the plasma cutter for your applications, you should consider the following:
Output power: Each plasma cutter has a rated output power, which directly dictates the thickness of the metal you can weld. When buying a plasma cutter, check for clean cut and severance ratings. The clean cut indicates the thickness you can cut cleanly at an optimized cutting speed (15 IPM). A severance cut is the maximum thickness that a plasma cutter can handle, but at a significantly lower speed, with sometimes unpredictable results.

CUT-55DS-PRO Clean Cut vs. Severance Cut
Cutting speed: The speed indicates how fast (typically in inches-per-minute IPM) the machine can cut the specific thickness. For example, a 55A cutter can cut 1/2" metal in one minute, while a 35A cutter can take five minutes. Choose the cutter with the faster speed and higher rating to achieve the highest-quality cutting results.
Arc start: The Arc starting console can establish the arc differently. For high-quality cutting results and longevity, we recommend non-contact, pilot arc starting methods. Touching the metal surface can contaminate the torch consumables and affect the cutting results.

Duty cycle: Like welding machines, plasma cutters have a rated duty cycle. The duty cycle indicates how long the cutter can run at a given amperage over a 10-minute period. For example, a 30% duty cycle at 50 amps means you can cut for 3 minutes straight at 50 amps before you have to make a 7-minute break. We recommend buying a high-duty cycle plasma cutter to avoid unnecessary downtime and improve cutting results.
Choosing the right one can make all the difference in your everyday cutting results. For everyday cutting, we recommend checking out YesWelder CUT55-DS.

CUT-55DS-PRO Non-HF Non-Touch Pilot Arc Plasma Cutter
2. Get Familiar With Your Plasma Cutter
Whenever you buy a new machine, including a plasma cutter, take your time to get familiar with it. Read the instruction manual to install the plasma cutter properly and understand its limitations.
Properly installing the cables, air filter, and torch consumables will ensure that your cutting machine is operating at its peak performance. Understanding its limitations will improve its safety and longevity.
3. Provide a Reliable Work Clamp Connection
To successfully plasma cut metals, you must ground the pieces you are about to cut or the metal table. Providing a good work clamp connection is crucial for establishing and maintaining an arc. Steady arc yields high-quality cutting results.
When connecting pieces, attach the work clamp as close to the cut as possible. You can also place the clamp on the workpiece itself. Make sure the surface you are attaching the ground to is dirt and rust-free. Rust, paint, oils, and other surface contaminants can interfere with the electrical flow.

Source: https://www.youtube.com/watch?v=-xHLw5gGeUo&t=1582s
Poor electrical flow creates an inconsistent arc across the cut. Poor arc stability can delay the arc by 0.5 seconds and cause defects along the cut line. Therefore, if you notice issues in arc consistency and cut quality, clean the surfaces and check the work clamp connection and cables. Worn cables or loose connections can add unnecessary resistance to electrical flow, affecting the overall quality of the cut.
4. Do a Test Run
If you are new to plasma cutting or have just bought a new plasma cutter, do a few test runs. Find scrap metal of the same type and thickness as the metal you will weld and run a few test runs on it. Practicing on scrap metal will help you adjust the amperage and your technique for the given metal-cutting application.
On long cuts, you should trace the path before cutting. Running a torch without pressing the trigger will help you adjust the movement for long, continuous cuts. Restarting the cuts in the same spot is challenging and can yield irregularities in the cut edge. Therefore, be sure to plan your cuts and do practice runs to get the highest quality cutting results.

Source: https://blog.red-d-arc.com/specialty-equipment/plasma-cutters/advantages-offered-by-plasma-cutting
5. Use and Maintain Adequate Torch Height
Torch-to-work distance, or torch height, is the parameter that dictates the voltage of the cutting process. Similar to welding, this is the distance between the electrode inside the plasma cutting torch and the grounded metal you are cutting.
Voltage is directly proportional to resistance, which in the arc is a function of distance. When the torch-to-work distance increases, the voltage goes up; when the torch-to-work distance decreases, the voltage goes down. Therefore, to get the highest quality cutting results, you should use and maintain an adequate torch height or a standoff.

Source: https://www.avidcnc.com/support/instructions/software/plasmaUsersGuide/
For most home-cutting applications, you should maintain a continuous 1/16-inch to 1/8-inch standoff. This torch height can increase the cutting capacity of smaller machines and extend the consumable life. However, keep in mind that standoffs won't work without non-touch pilot arc plasma cutters.
If your torch supports it, you can use a drag shield for better precision. The drag shield allows you to rest the torch on the workpiece while maintaining an optimal standoff without touching the metal surface.
Inadequate torch-to-work distance causes angularity. If the upper edge of the cut is longer than the lower edge, the cut angle is negative. A negative cut angle means your torch is too low, so you will need to increase the standoff. If the lower edge of the cut is longer than the upper edge, the cut angle is positive. A positive cut angle means your torch is too high, so you will need to decrease the standoff.
Keep in mind that a slight variation in cut angles is tolerable. Variations can occur as you run over bumps and warps caused by transport, heat impact, or corrugated metals. Thus, keeping the torch height consistent across the cut is crucial in achieving the best cutting results.

Source: https://www.youtube.com/watch?v=NYhNay21PFY&t=1164s
6. Adjust the Cutting Speed
Adjust the cutting speed to the thickness, power, and type of metal you are cutting. The improper travel speed will produce dross on the cutting edge. Dross affects the cut quality and requires cleaning, increasing the overall time spent cutting and costs.

How Cutting Speed Affects Cut Quality
Source: https://www.hypertherm.com/resources/system-support/maintenance-and-use/cut-quality/too-much-dross/
Plasma cutting almost always requires higher cutting speeds. The faster you travel (especially on aluminum), the cleaner your cut will be. However, you shouldn't overdo it.
Moving too fast will cause the arc to lag in the kerf and produce hard dross on the bottom. You will notice an "S" shaped lag lines across the cut face and hard dross you will need to grind off.
Moving too slowly widens the kerf, preventing complete metal expulsion. Bubbly or globular dross attaches and hardens along the bottom edge of the cut. Some lag lines can be present, but the dross comes off in large chunks.
To address these issues, adjust the travel speed so that the arc exits the material at a 15—to 20-degree angle opposite the direction of travel. Using the right travel speed and amperage produces immaculate cuts with little to no dross and narrow kerf.

Adjust speed for a 15–20° arc exit angle against travel.
Source: https://www.youtube.com/watch?v=vGIHXOgtYQ4&t=385s
7. Don't Forget The Kerf
A kerf is a gap where the excess material is expelled during the cutting procedure. The material goes to waste, and you are left with a gap, which you must take into account, especially when trying to make precise cuts. Failing to take the kerf into account can reduce your part size by the kerf width.

A kerf is a gap where the excess material is expelled during the cutting procedure.
Source: https://www.jasic.co.uk/post/plasma-cut-quality
Lower-amp consumables can reduce the kerf width and improve cut quality. These consumables have a smaller orifice, meaning you can produce more precise and cleaner cuts with a narrow kerf. However, you will have to tune up the amperage and sacrifice the speed, but it is well worth it.
8. Check the Consumables
If you did everything right, but your cuts are not clean, or you have issues starting the arc, you should check the consumables. As their name suggests, these parts of the plasma cutting torch are slowly consumed during the procedure.

No Start Arc Issue
Source: https://www.youtube.com/watch?v=FIMDaiMlZx8
Each consumable has its own lifespan. However, poor technique, lack of cooling, moisture, contact with rusty or dirty surfaces, or cutting severance thickness can increase the deterioration. Worn-out consumables will affect the cutting quality and arc performance.
If you are occasionally plasma cutting, be sure to inspect your consumables regularly. Check your tip and electrode for signs of damage or contamination.

Source: https://www.youtube.com/watch?v=6kfgijWaqXY
The tip of the torch has a small hole that directs the plasma stream. Once spatter, heat, or moisture damage or clog the hole, it becomes irregularly shaped. A contaminated or damaged hole will produce inconsistent results and poor-quality cuts.
Also, regularly check the electrode. The plasma-cutting electrode sits just behind the tip and contains a small amount of hafnium. Hafnium is consumed every time the arc starts, so if you see a pit in the electrode, discard it.
The best practice is to change both the tip and electrode periodically. When changing the consumables, don't over-tighten the retaining cup. The parts inside need to move to create an arc, so only hand-tighten the cup.

Change the tip and electrode periodically.
Source: https://www.youtube.com/watch?v=cYNX7MXUr48&t=154s
9. Use The Right Gas To Improve Cutting Quality
For home or metal fab shop applications, you are likely to use shop air to run plasma cutting. All you need is an air compressor and a filter to remove moisture that can damage the consumables and affect the cutting quality. This gas setup is more than enough for everyday cutting on mild steel, aluminum, or stainless steel, but you can use other gases to improve the cutting results.

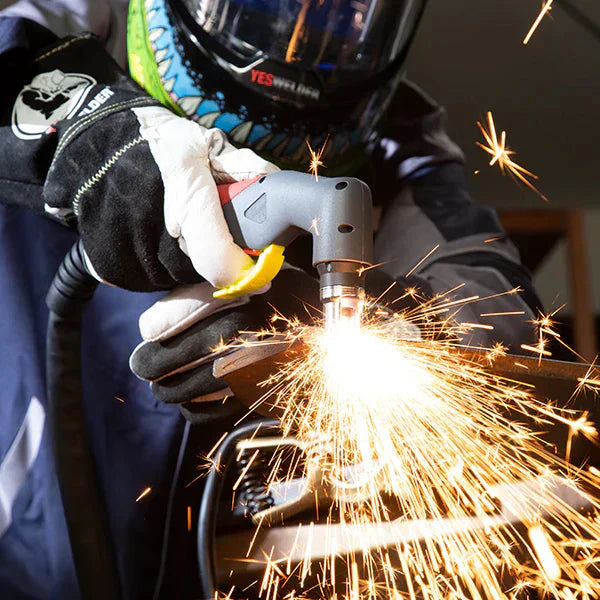
Plasma Cutting Process
Photo by @staceysteele (TikTok)
The gas choice can affect the surface finish of the metal or roughness. "Roughness" describes the texture of the cut face, and you should expect some of it in your everyday cutting. However, you can improve these results by using gases such as argon, nitrogen, or oxygen.`
For example, compressed air produces clean cuts on mild steel, but it forms nitrided edges and increases surface hardness. Oxygen, on the other hand, produces exceptional edge quality. However, oxygen can oxidize the edges, making them more challenging to weld.
You can use compressed air to cut aluminum thinner than 1/8". However, you can improve cutting quality by using an H35 mixture of 35% Hydrogen and 65% Argon. Nitrogen also improves cutting performance on aluminum and stainless steel. Inert gases reduce the coloration of stainless steel. Although bottled gases are more expensive, they can yield much cleaner and higher-quality cutting results.

Source: https://www.youtube.com/watch?v=7UNAtduhS5c
10. Check Gas Quality and Connections
If you have the correct gas but still encounter cut quality-related issues, check the gas connections, sources, or air compressor. For the best results, always use high-purity gases. When connected to an air compressor, make sure the filter picks up excess moisture from the air.
Check all the connections and hoses for leaks and restrictions. A compressor or regulator must provide consistent gas flow and pressure to produce consistent cutting results. Moisture, contamination, obstructions in the nozzle, or improperly sized regulators and gas lines can affect the cutting quality and deliver poor results.
When buying an air compressor, make sure it is compatible with your plasma cutter. Each plasma cutter has recommended air pressure and air compressor requirements. For example, YesWelder CUT-65-DS requires 4-7 CFM at 72 PSI. The compressor must provide sufficient pressure and gas flow for the cutter to produce the highest-quality results.

CUT-65DS-PRO Non-HF Non-Touch Pilot Arc Plasma Cutter
11. Beveling and Cutting Holes With a Plasma Cutter
You can use a plasma cutter to bevel the edges for multi-process welds or cut holes inside the metal.
Beveling the edges of medium-thick plates with a plasma cutter is much faster and more cost-efficient than traditional oxyfuel processes. To bevel an edge, you tilt the torch head to a 30—to 40-degree angle and make your cut. However, getting the best results might take some time and practice.
A plasma cutter is also an excellent tool for cutting bolt holes. Although it can be challenging for beginners, it is fast and convenient. To stabilize the arc and produce the best results, start the cut from the center of the hole and move toward the edges.

Source: https://www.911motorsports.net/Bolt-Hole-y-Cross-Stencil--Plasma-Cutter-Guide_p_63.html
12. Use Templates or Consider Automation
If you make a lot of repetitive welds, consider using templates or even automating the process. Templates are a cheap way to ensure you get precise, high-quality results each time. When making a template, make sure the drag shield can ride along it without jumping over it. Also, don't forget to account for the kerf. You can use roller guides for straight or circular lines.
If you run a medium fabrication shop, consider automating plasma cutting for the highest-quality, cleanest, and most repetitive cuts. You can automate plasma cutting through a CNC table or collaborative robots, also called cobots. CNC tables are cheaper automation for small to medium shops that produce repetitive small to large-part batches. Cutting cobots greatly increase cutting speeds, quality, and performance, but you need to justify the costs.

CNC Plasma Cutting Process
Photo by @jkwelding_ (TikTok)
Common Plasma Cut Quality Issues And Solutions
We will conclude our article with a quick table of the most common plasma cut quality issues, their descriptions, and possible solutions. The following table will make troubleshooting plasma cut quality issues much easier and more convenient.
|
Issue |
Sign |
Solution |
|
Positive cut angle |
More material is removed from the top |
Decrease torch-to-work distance |
|
Negative cut angle |
More material is removed from the bottom |
Increase torch-to-work distance |
|
Top edge rounding |
Slight rounding along the top edge |
Use a consistent standoff and enough power |
|
High-speed dross |
S-shaped lag lines and hard-to-remove dross |
Reduce travel speed |
|
Low-speed dross |
Wide kerf, bubbly or globular dross that easily peels and falls off |
Increase travel speed |
|
Top spatter |
Excessive spatter on the surface of metal pieces |
Reduce travel speed |
|
Roughness |
Texture on the cut face surface |
Use different or high-quality cutting gas |
|
Colors |
Chemical reactions between metal and cutting gas |
Use a non-reactive cutting gas |
|
Poor arc stability and lag |
Arc lags too much behind and produces unstable results |
Check work clamp, connections, and surface conditions |
|
Poor arc start and stuttering |
The pilot arc barely starts or stutters |
Check consumables |
|
Too wide kerf |
Too much metal is blown away by the plasma stream |
Increase travel speed or use lower amp consumables |
🧐12 Tips To Improve Your Plasma Cutting Results FAQ
👏 You may be interested in the following:


Leave a comment